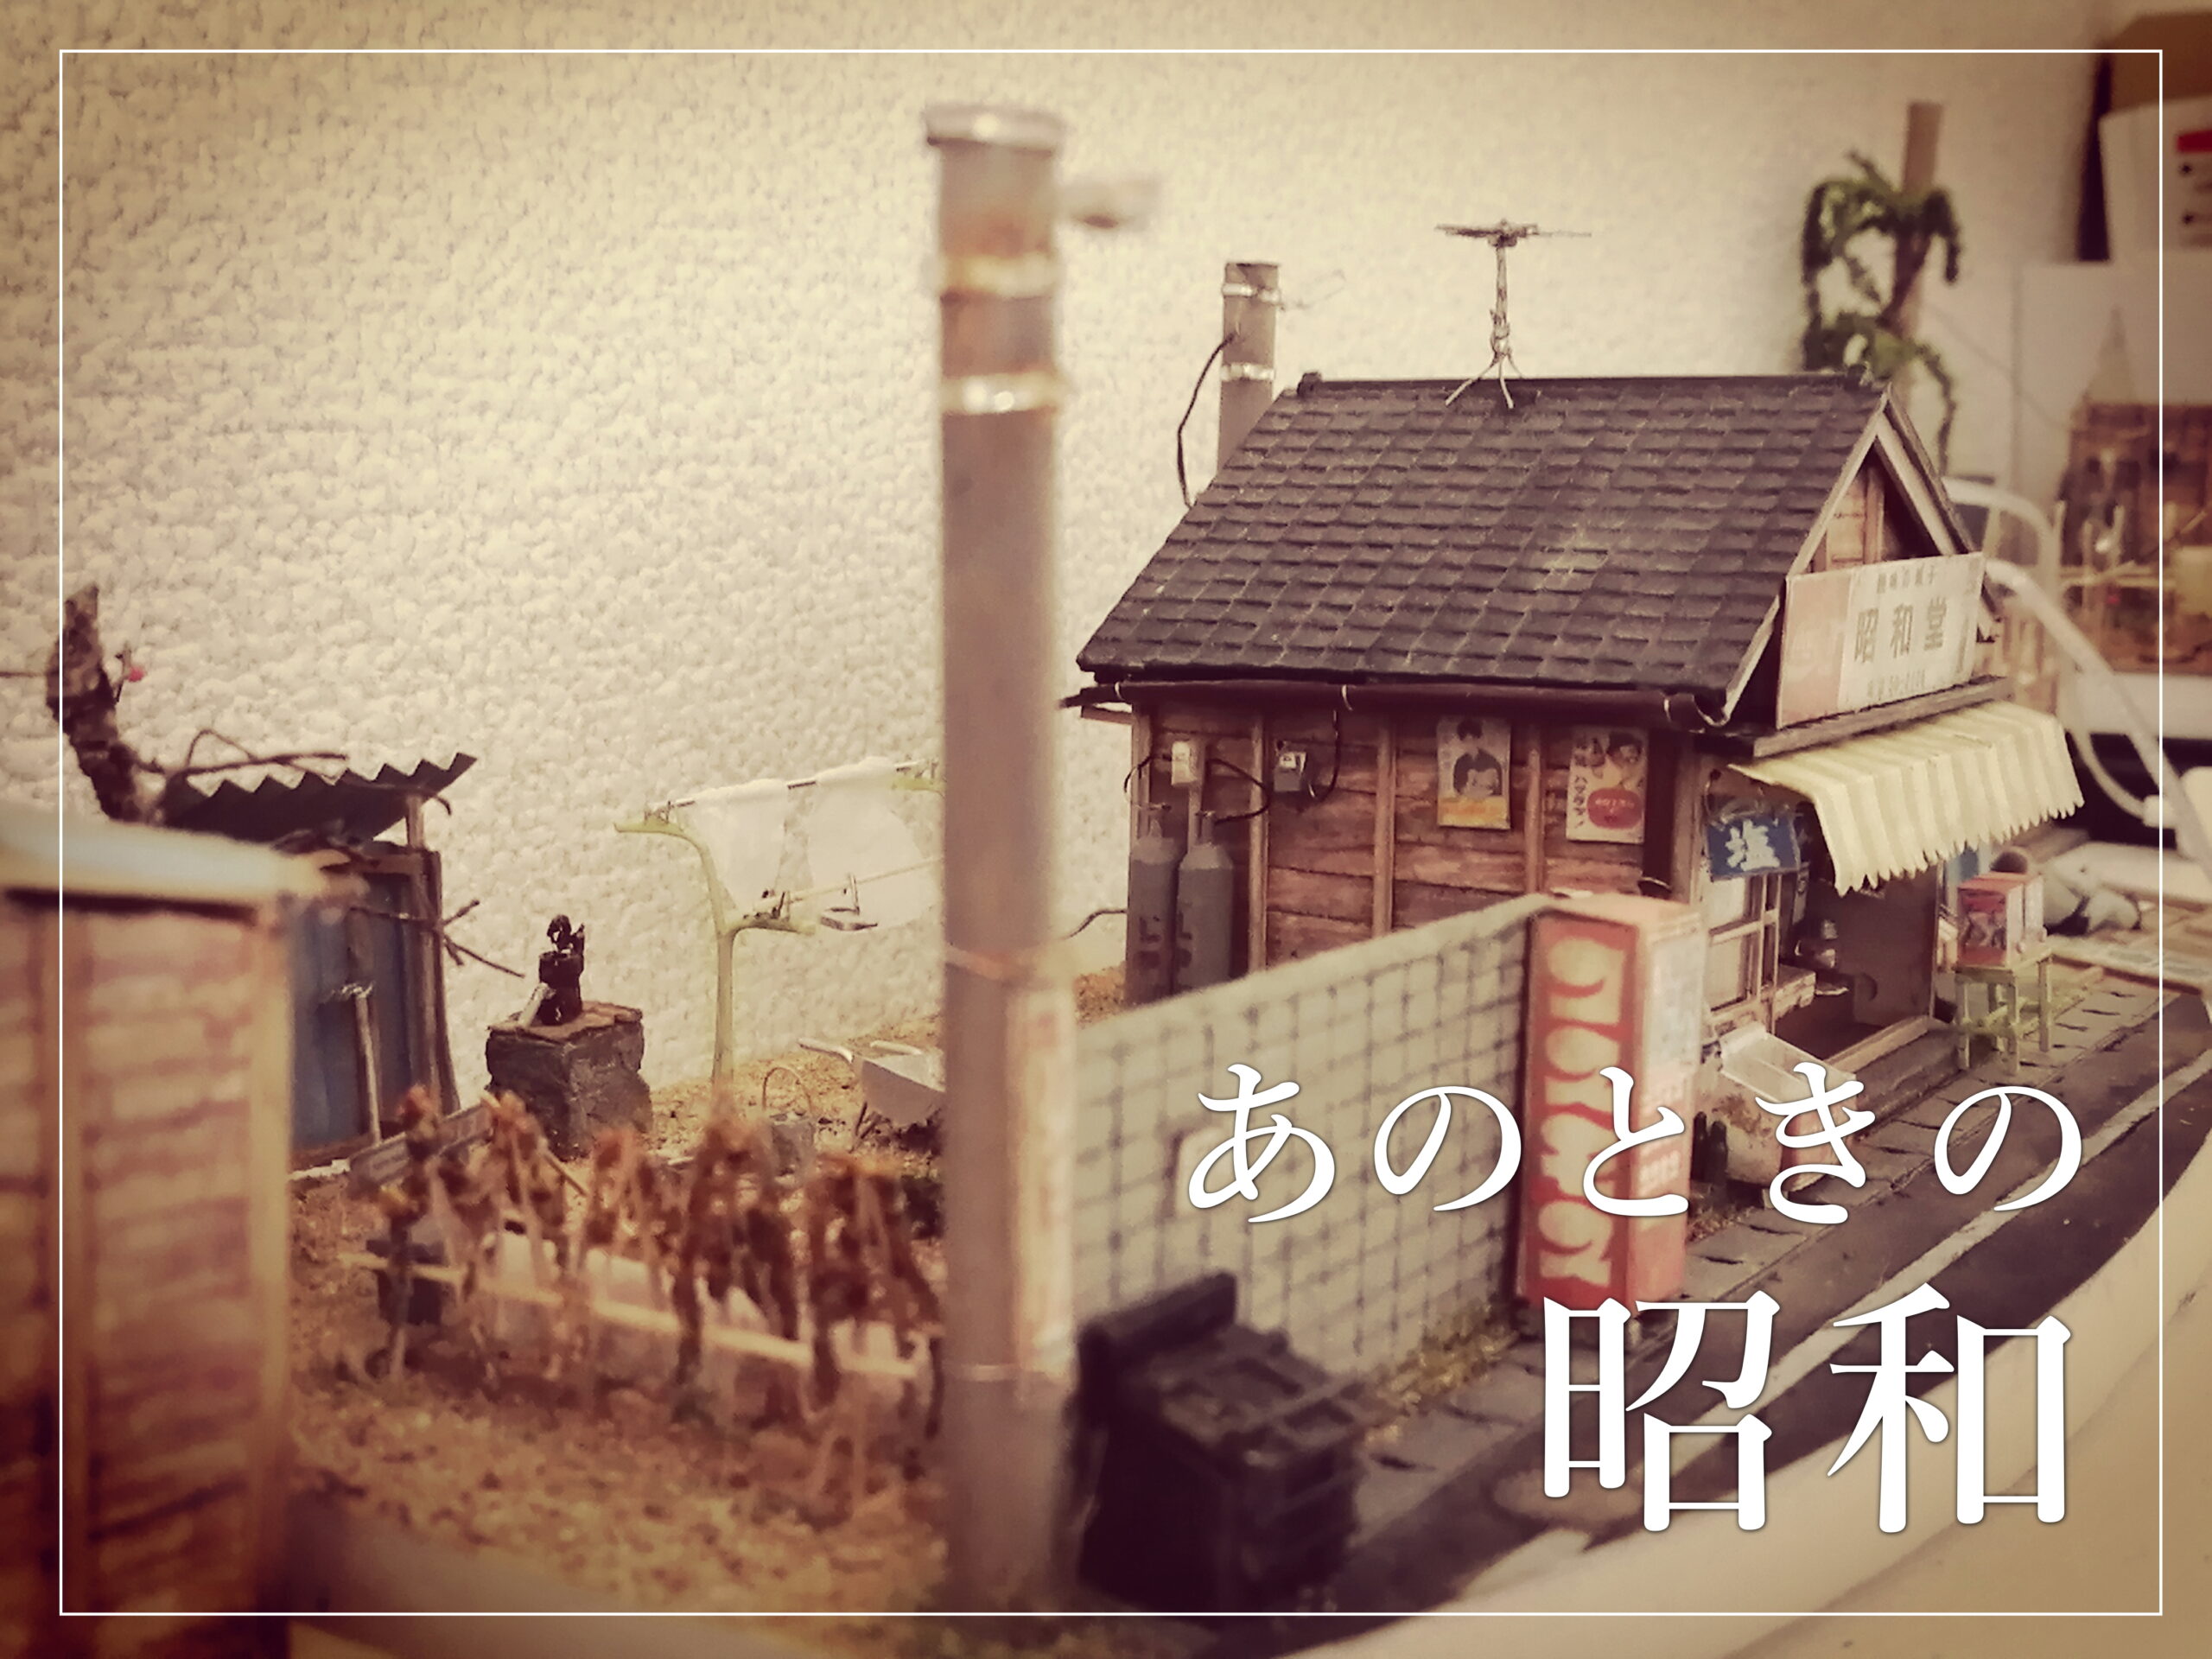


室内灯や電柱の電飾
Illuminations of interior lights and utility poles
私には、はんだづけや基盤回路作りといった技術がありません。
ジオラマ模型の電飾のためには、そうした技術を覚えておくと良いと思います。
はんだごてなどの道具を意識揃えましたが、そもそも電飾のためのLEDパーツをどのように購入して、どのように配線したらよいのかまったくわからないので、100円均一のお店を何日もうろうろしていました。
I can’t install LED lighting.
The reason is that I don’t understand electronic boards.
Therefore, I use LED lighting from a 100-yen shop.
In the United States, it is sold at 99 cent shops.
It has 5 LED bulbs connected and is lit by USB.
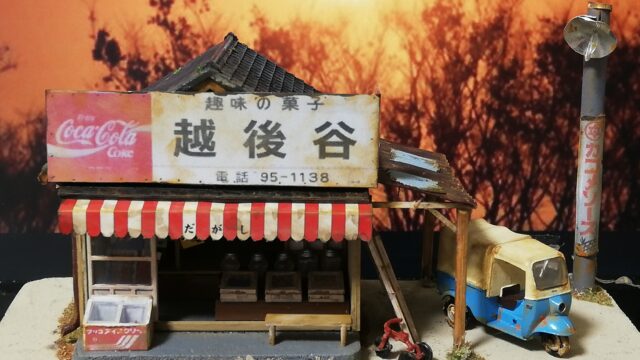
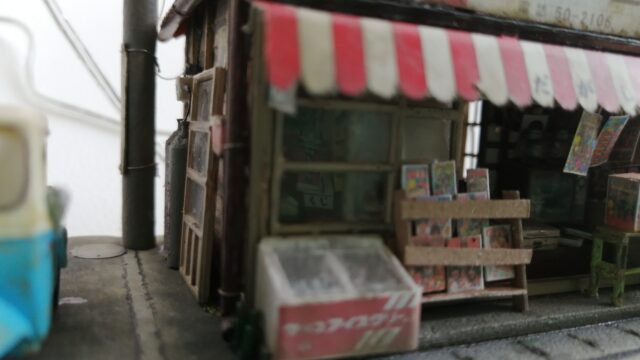
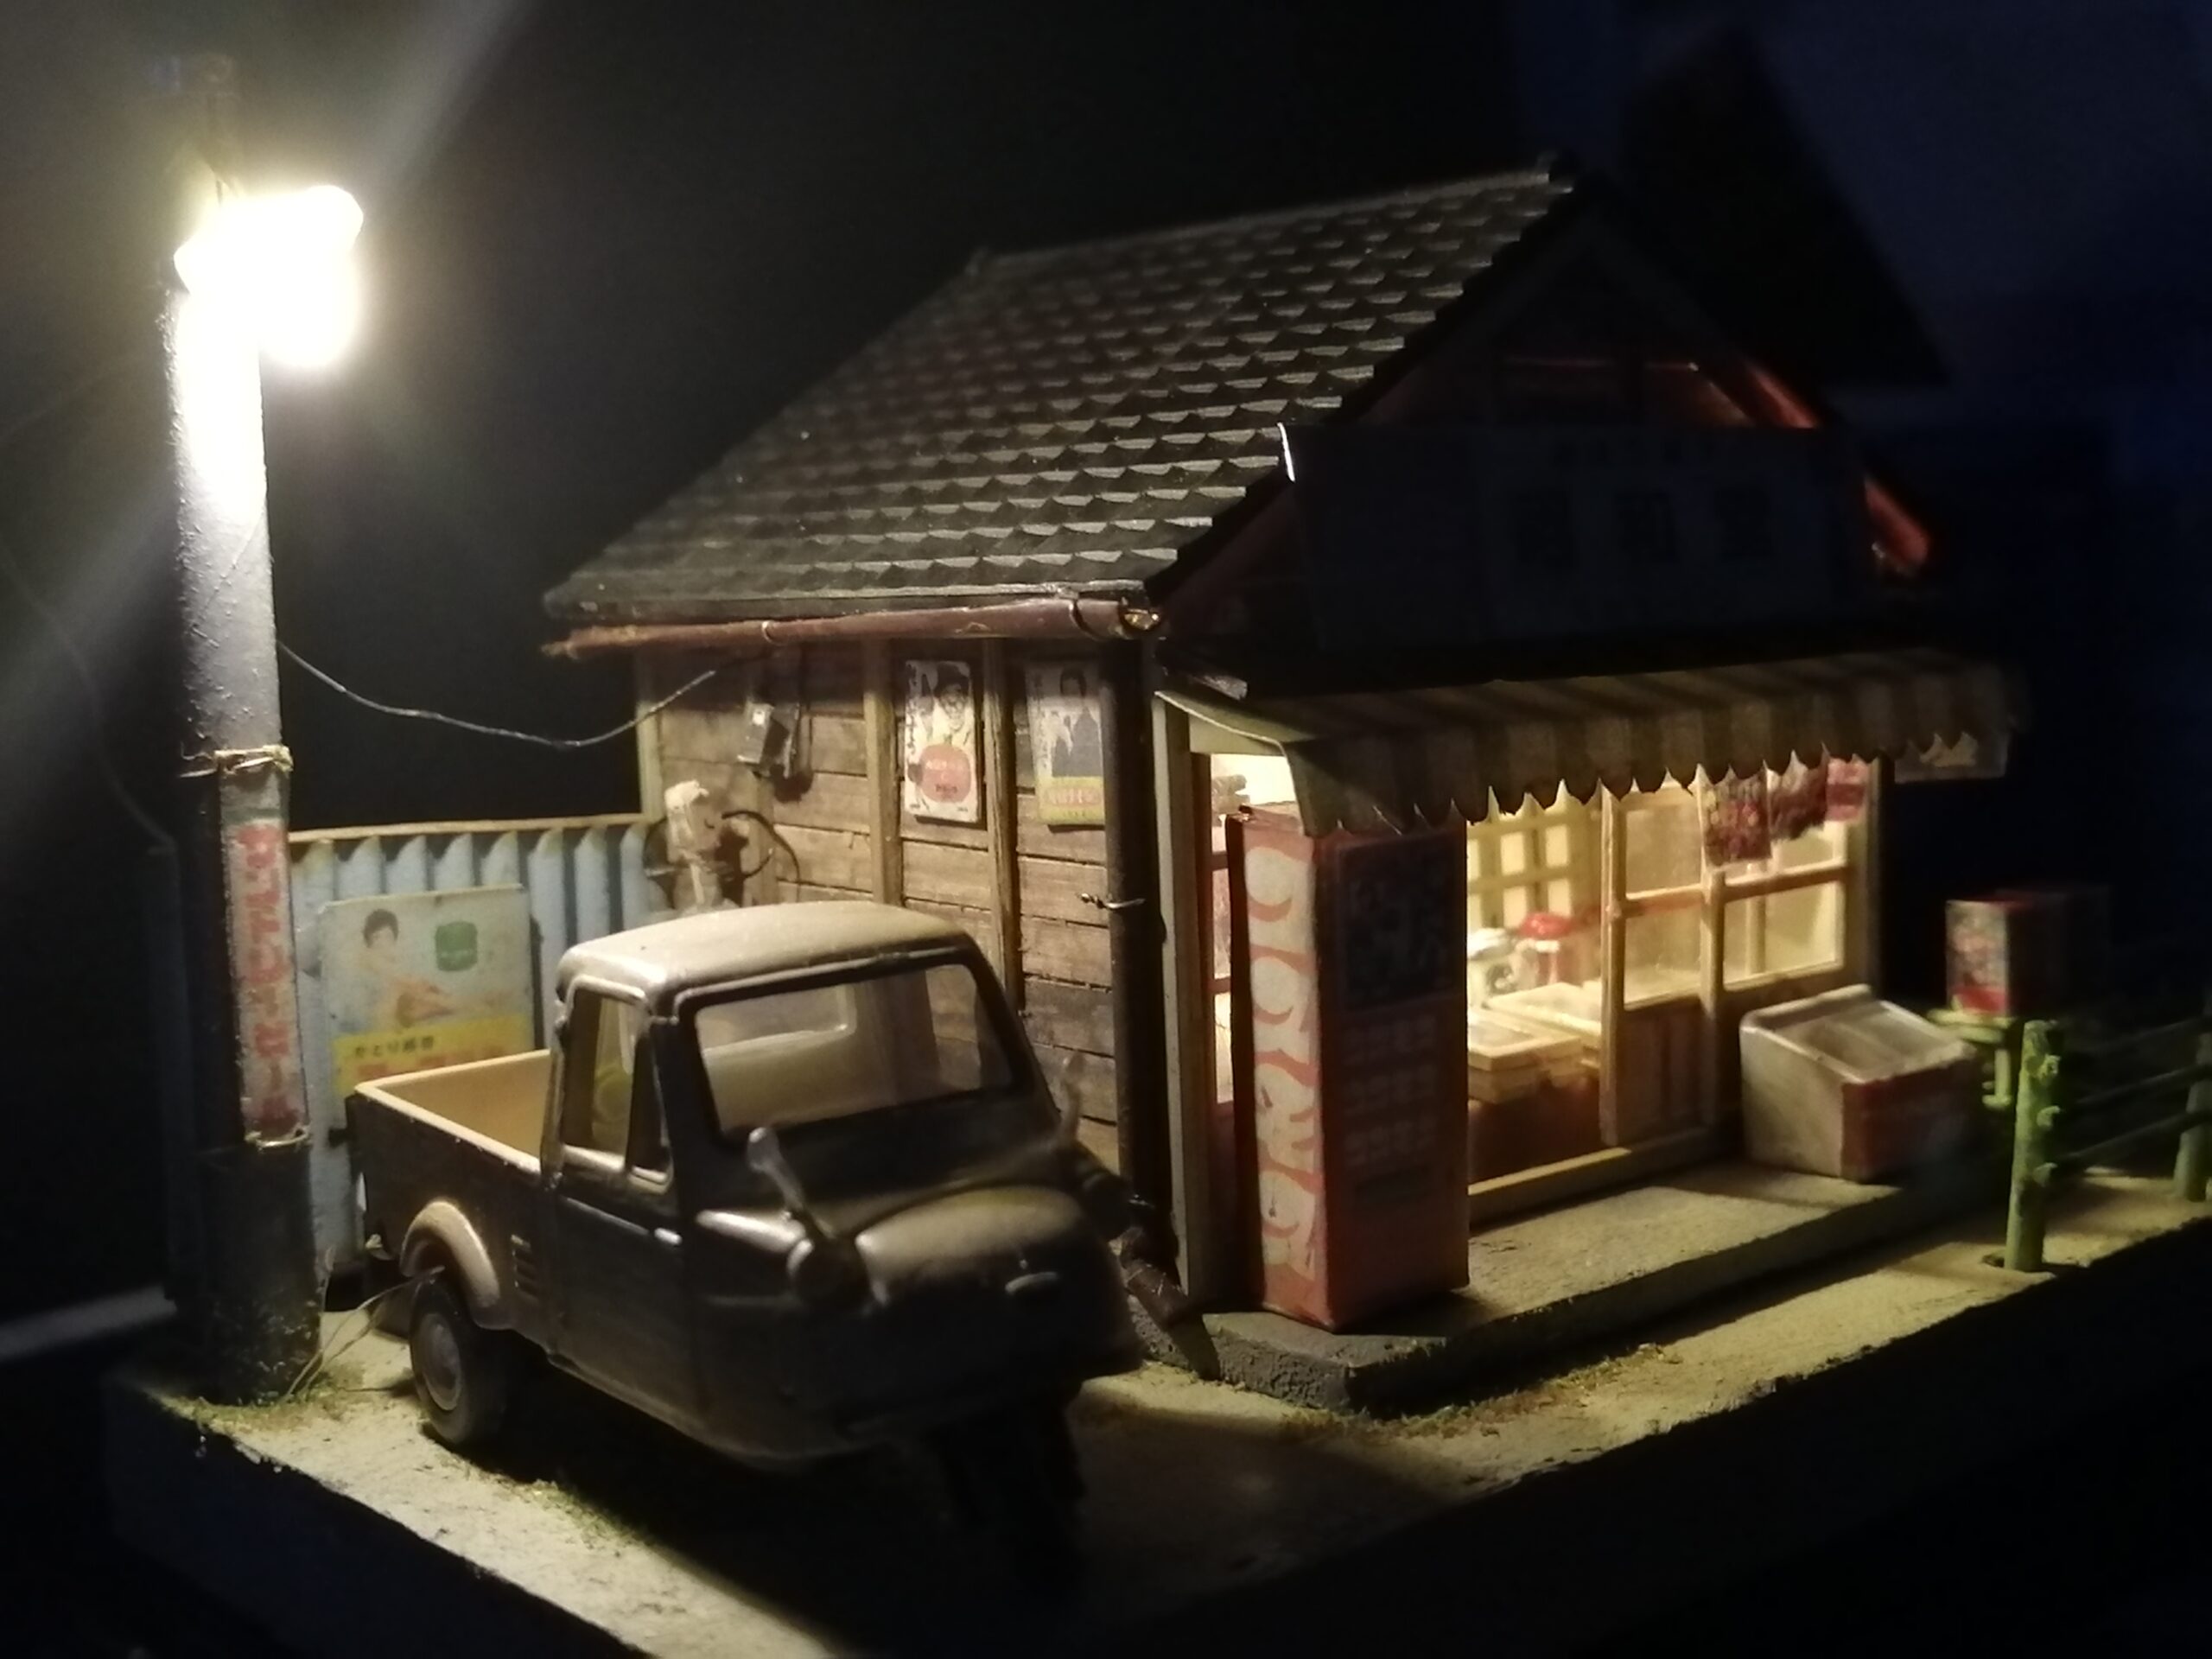
In the case of this work, two LEDs are used in the room and on the utility pole.
I use it so that the extra LED does not turn on.
You can check the moment when the LED goes out on YouTube.
It’s all in Japanese, but you can see the moment when it disappears from 9 minutes.
https://youtu.be/okof0NYRKr8
This way I always attach lights to my diorama.
Complex lighting is possible with a USB-HUB.
Above all, the power can be taken from USB, which is very good.
The translation software uses English, so please forgive me for making it strange.
100円均一のLED電飾
LED illuminations sold at 100-yen shops
ある時、100円均一のお店でUSBから電源を取る電飾を見つけました。
LED球が5個ついて、色は裸電球のような色です。
これなら配線の知識もはんだごての技術もいりませんので、一気に目の前が開けた感じになりました。
ただ、問題は、LED球の5個すべてはいらないので、どのようにして途中のLED球だけを点かないようにするのかが課題となりました。
One day, I found an illumination that takes power from USB at a 100-yen shop.
With 5 LED bulbs, the color is like a bare light bulb. In this case, I didn’t need any knowledge of wiring or soldering iron technology, so I felt like I was open in front of me at once.
However, the problem is that we don’t need all five LED bulbs, so the challenge was how to avoid turning on only the LED bulbs in the middle.
LED球の破壊 Destruction of LED bulb
ハンマーで叩く Hit with a hammer
最初はこの方法でうまくいきました。
問題なのは、かなり大きな音がすることです。そして、力加減が難しいことです。
案の定、ハンマーの振り下ろす力を入れすぎると、LED球の破壊もろとも断線を起こし、全ての電球が点かなくなるという事態が起きました。
これでは、材料費が無駄になるので、圧迫させて破壊する方法を思いつきました。
At first this method worked.
The problem is that it makes a pretty loud noise. And it is difficult to adjust the force. Sure enough, if you put too much force on the hammer to swing it down, the LED bulb would be destroyed and the wire would break, causing all the light bulbs to turn off.
This wastes material costs, so I came up with a way to squeeze and destroy it.
小さい万力で圧迫させる Squeeze with a small vise
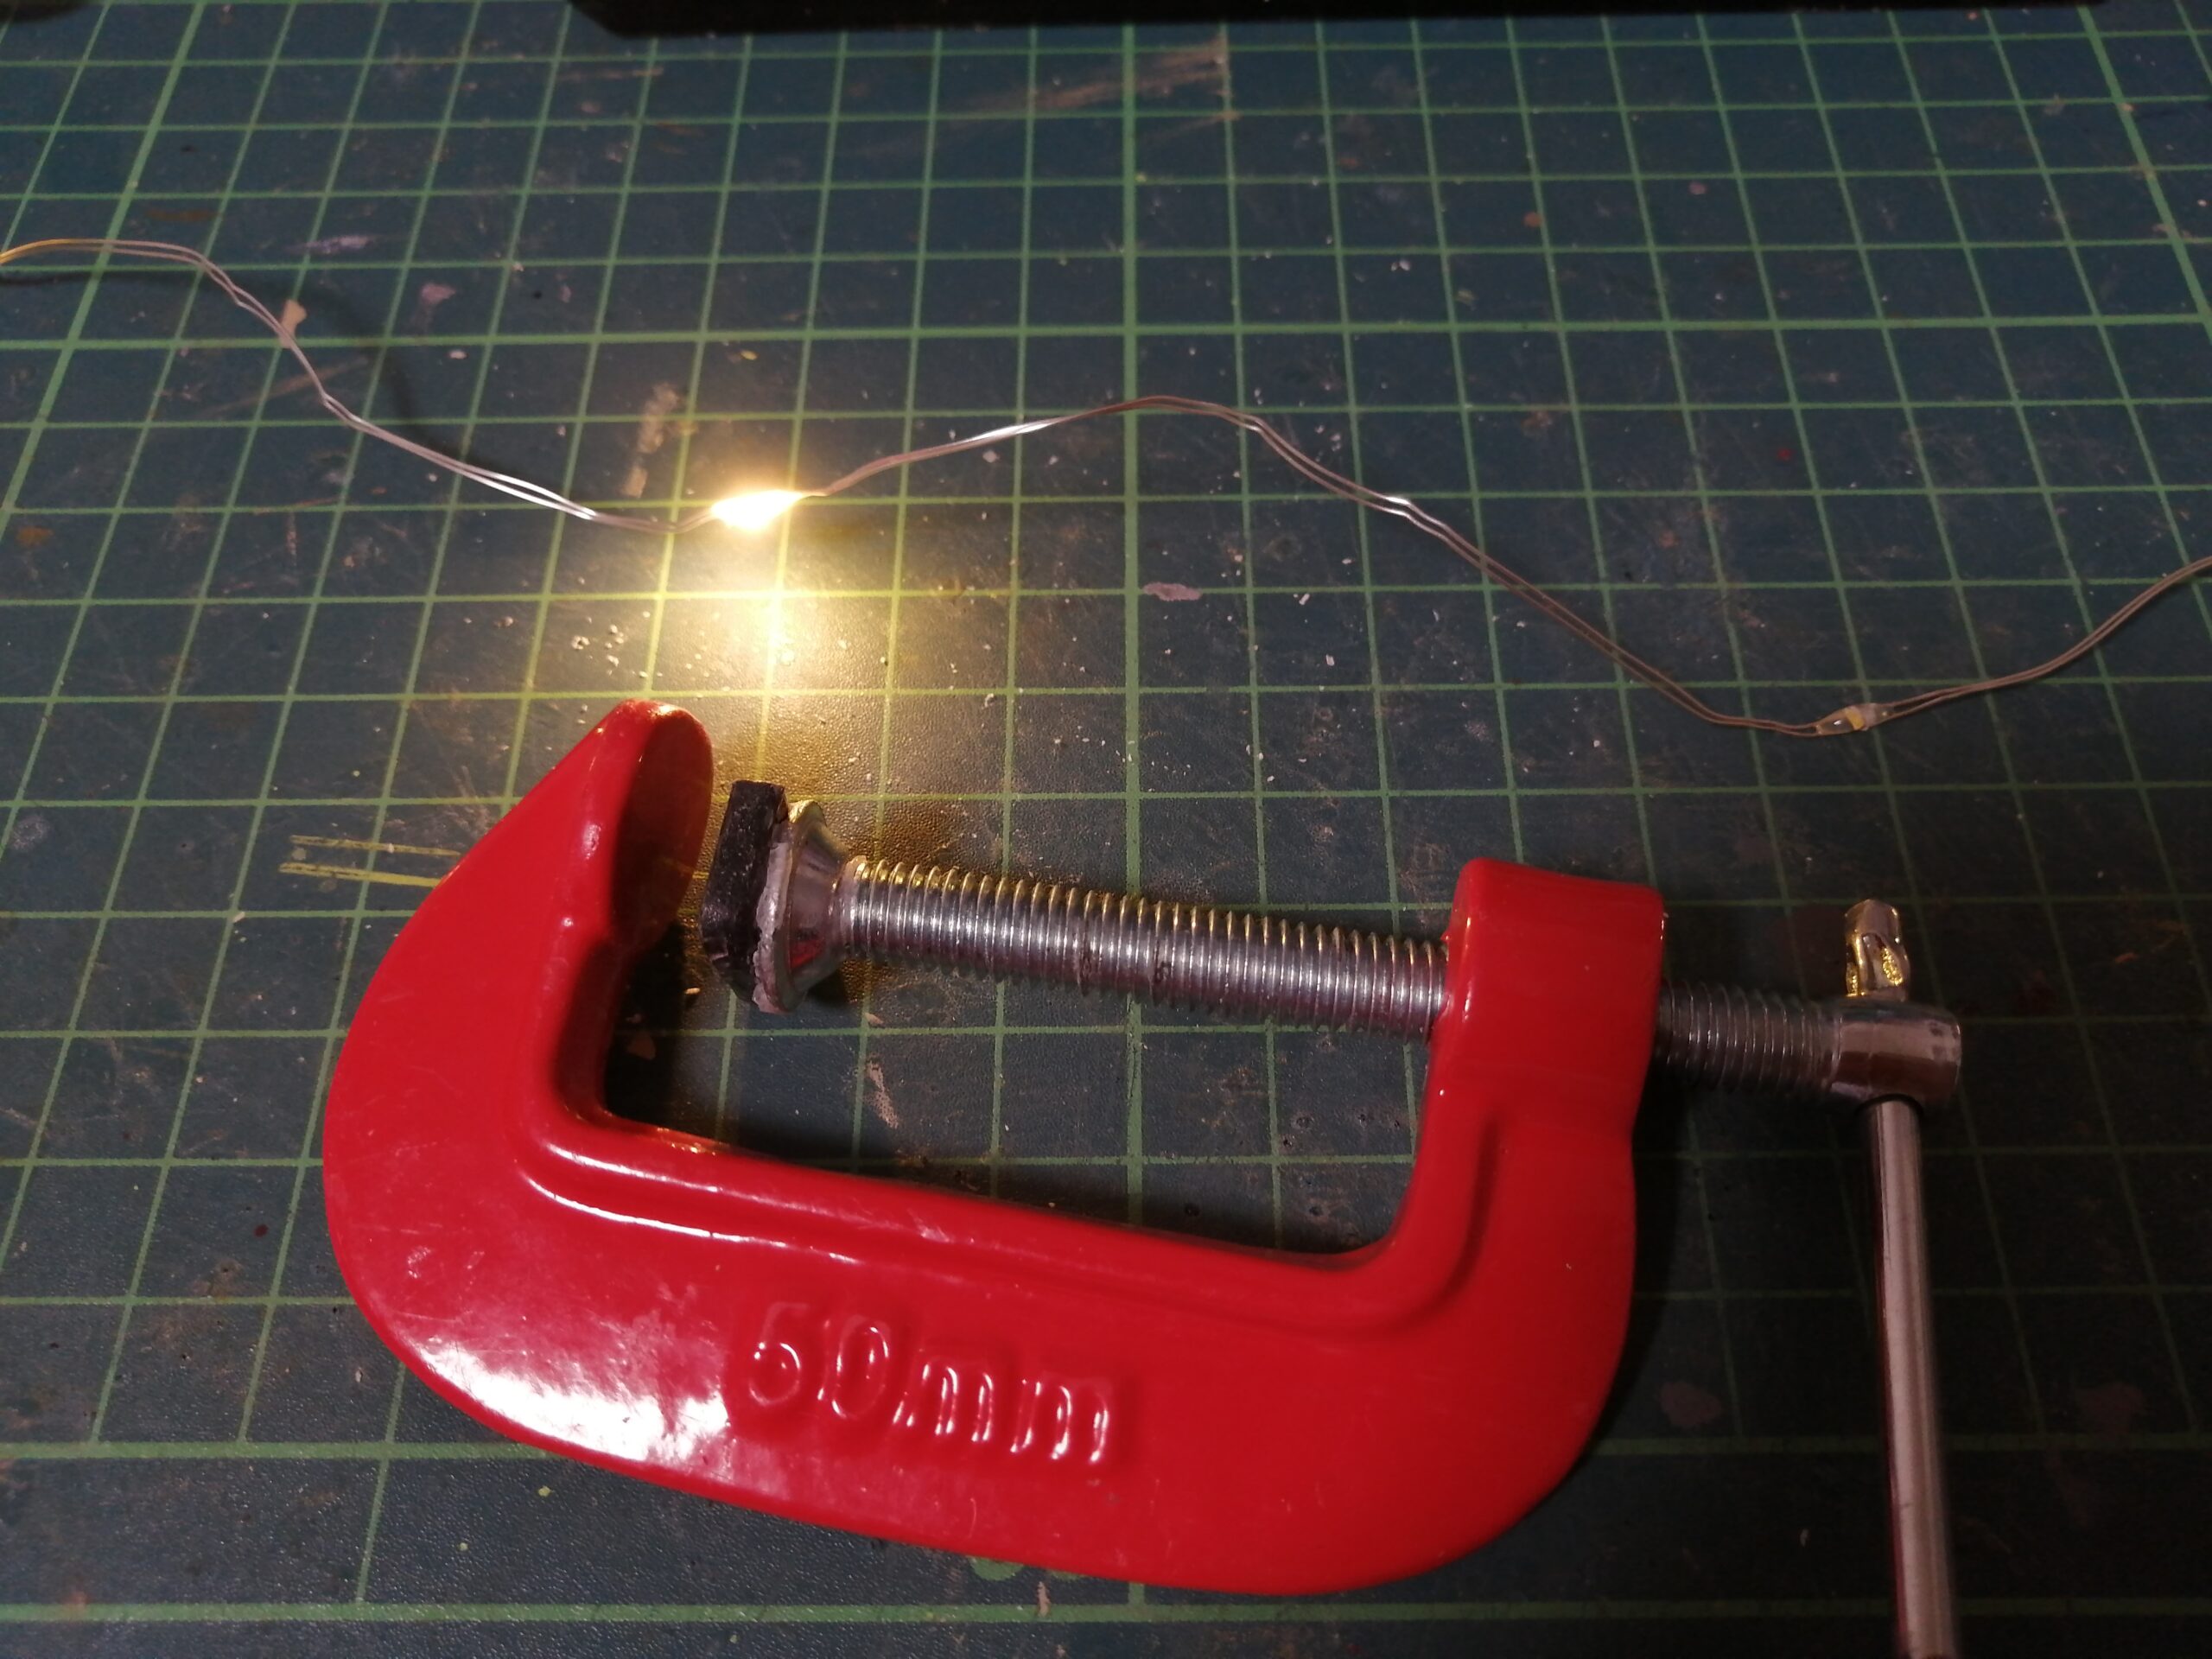
万力のネジが付いた方の座にプラスチックの板を取り付け、これでLED電球を締めつけることでうまいこと破壊できないかと考えました。
- LED電球がうまく挟めない
- ネジを締めあげている途中でLED電球が逃げる
それでも、ハンマーで叩くよりは成功の確率が高く、力の加減も調節しやすくいい方法だと思いましたが、最強の方法を見つけました。
それは、LED電球を直接ドリルで破壊するという方法です。
I attached a plastic plate to the seat with the vise screw and wondered if it could be destroyed by tightening the LED bulb.
- LED bulb does not pinch well
- LED bulb escapes while tightening screws
Even so, I thought it was a good method because it had a higher probability of success than hitting with a hammer and it was easy to adjust the amount of force, but I found the strongest method.
The method is to destroy the LED bulb directly with a drill.
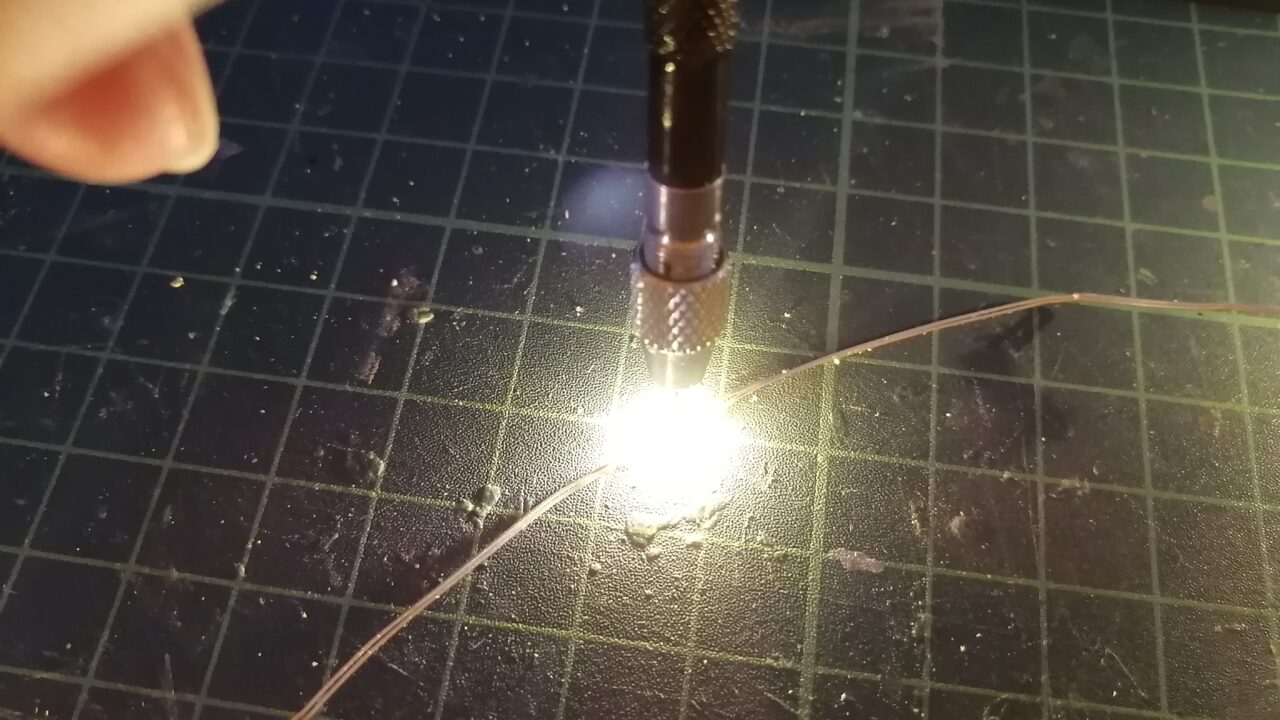
ピンバイスでLED電球を狙って破壊
Aim and destroy LED bulbs with pin vise
破壊したいLED電球にピンバイスで穴をあけます。
Make a hole in the LED bulb you want to destroy with a pin vise.
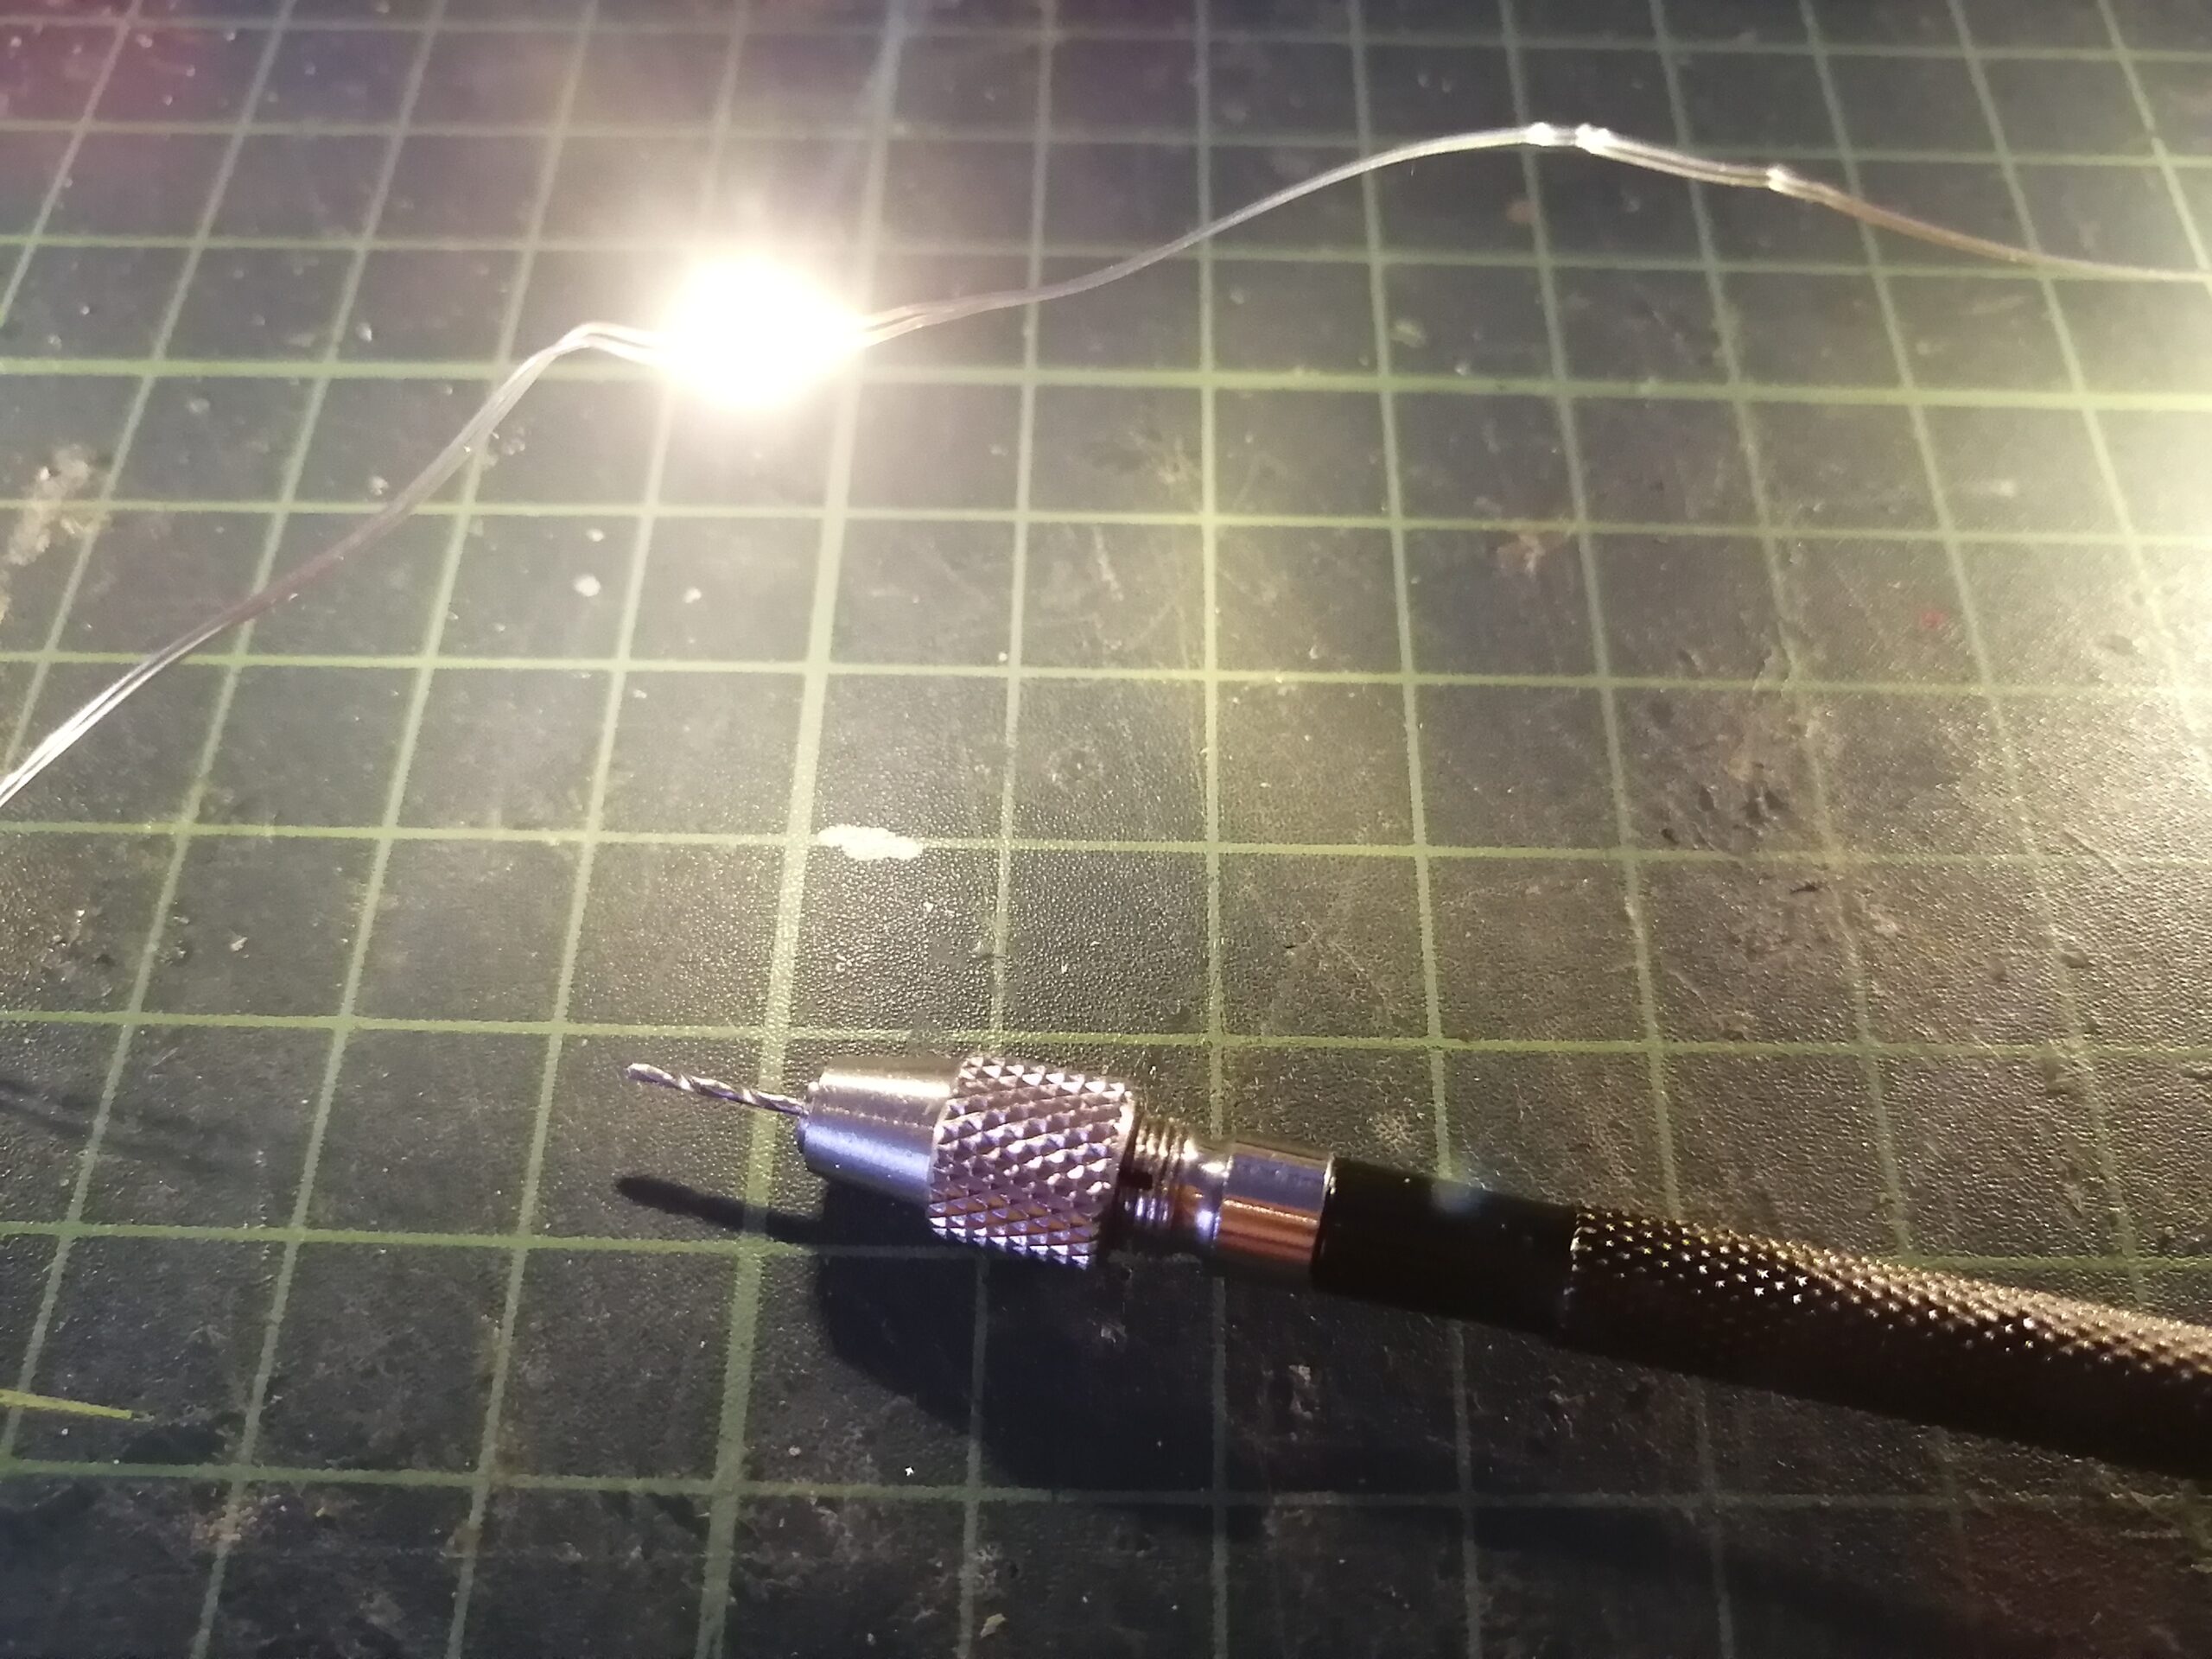
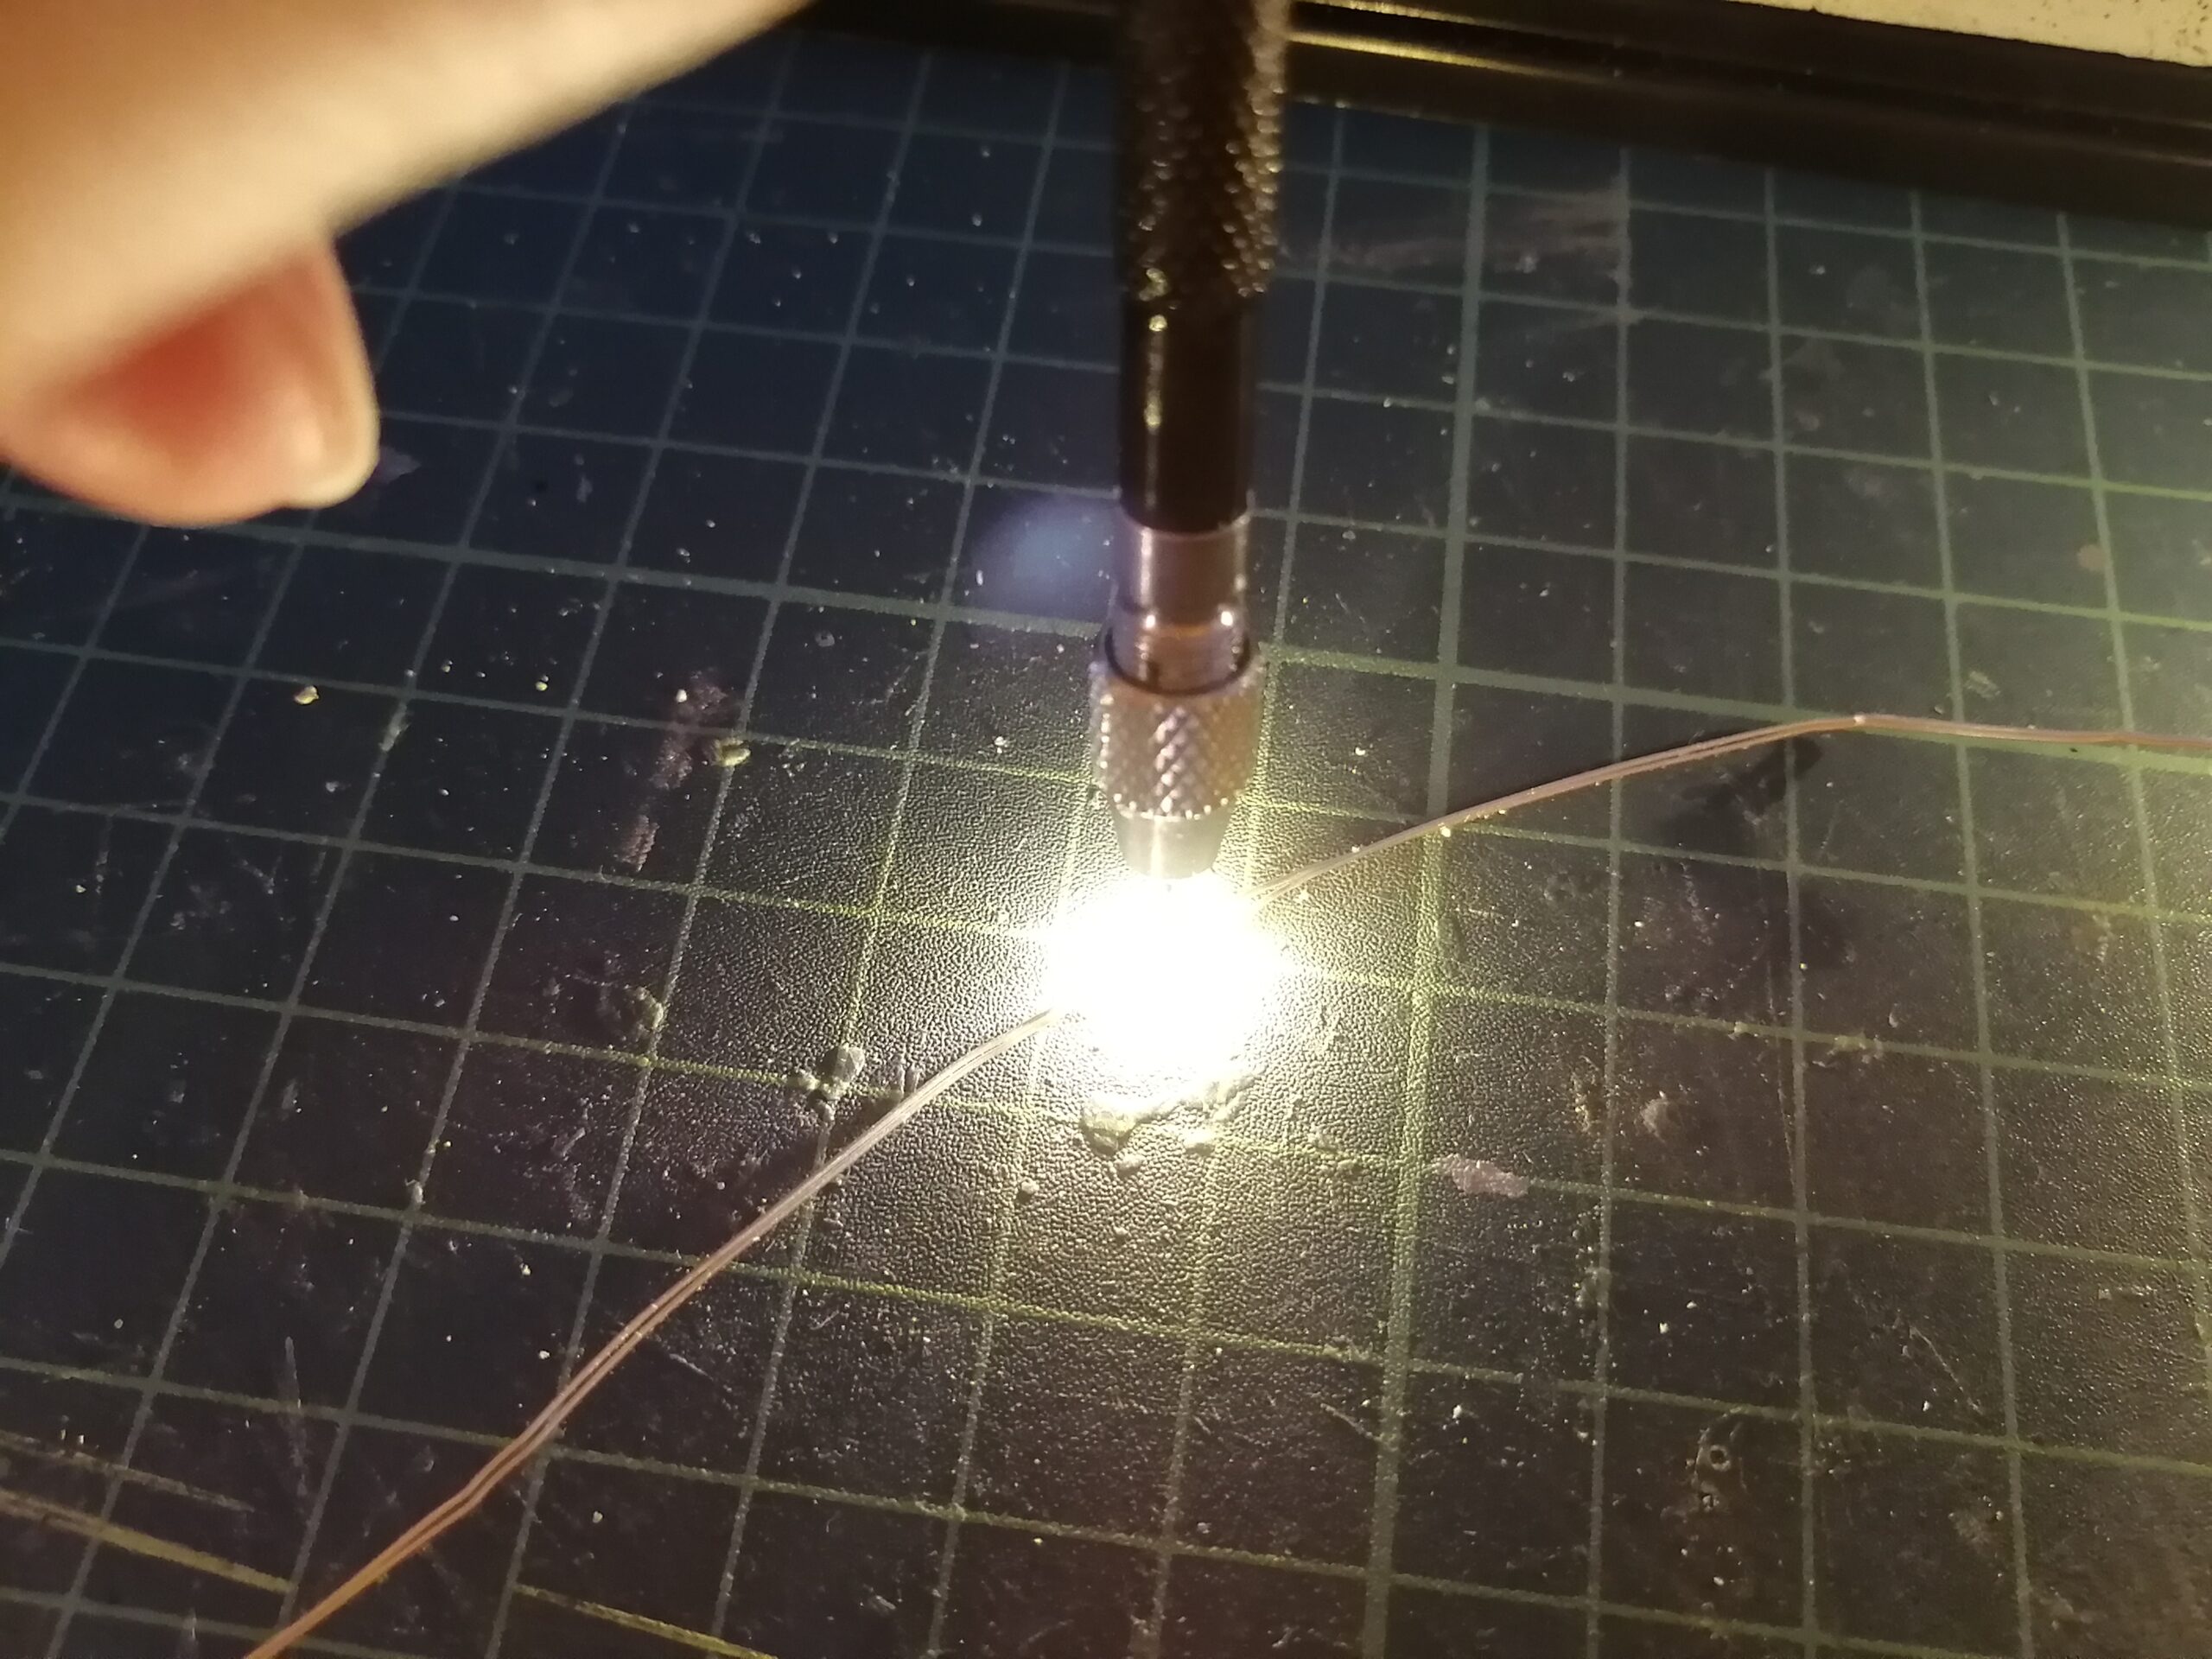
電球を点けながら作業するのは、「電球が消える=破壊完了」が一目瞭然だからです。
ピンバイスの先が滑って逃げるのですが、引っ掛かりができてしまえば、あとは順調にドリルで穴が掘れます。そのうちに、チカチカ…と、そのLED電球だけが消えます。
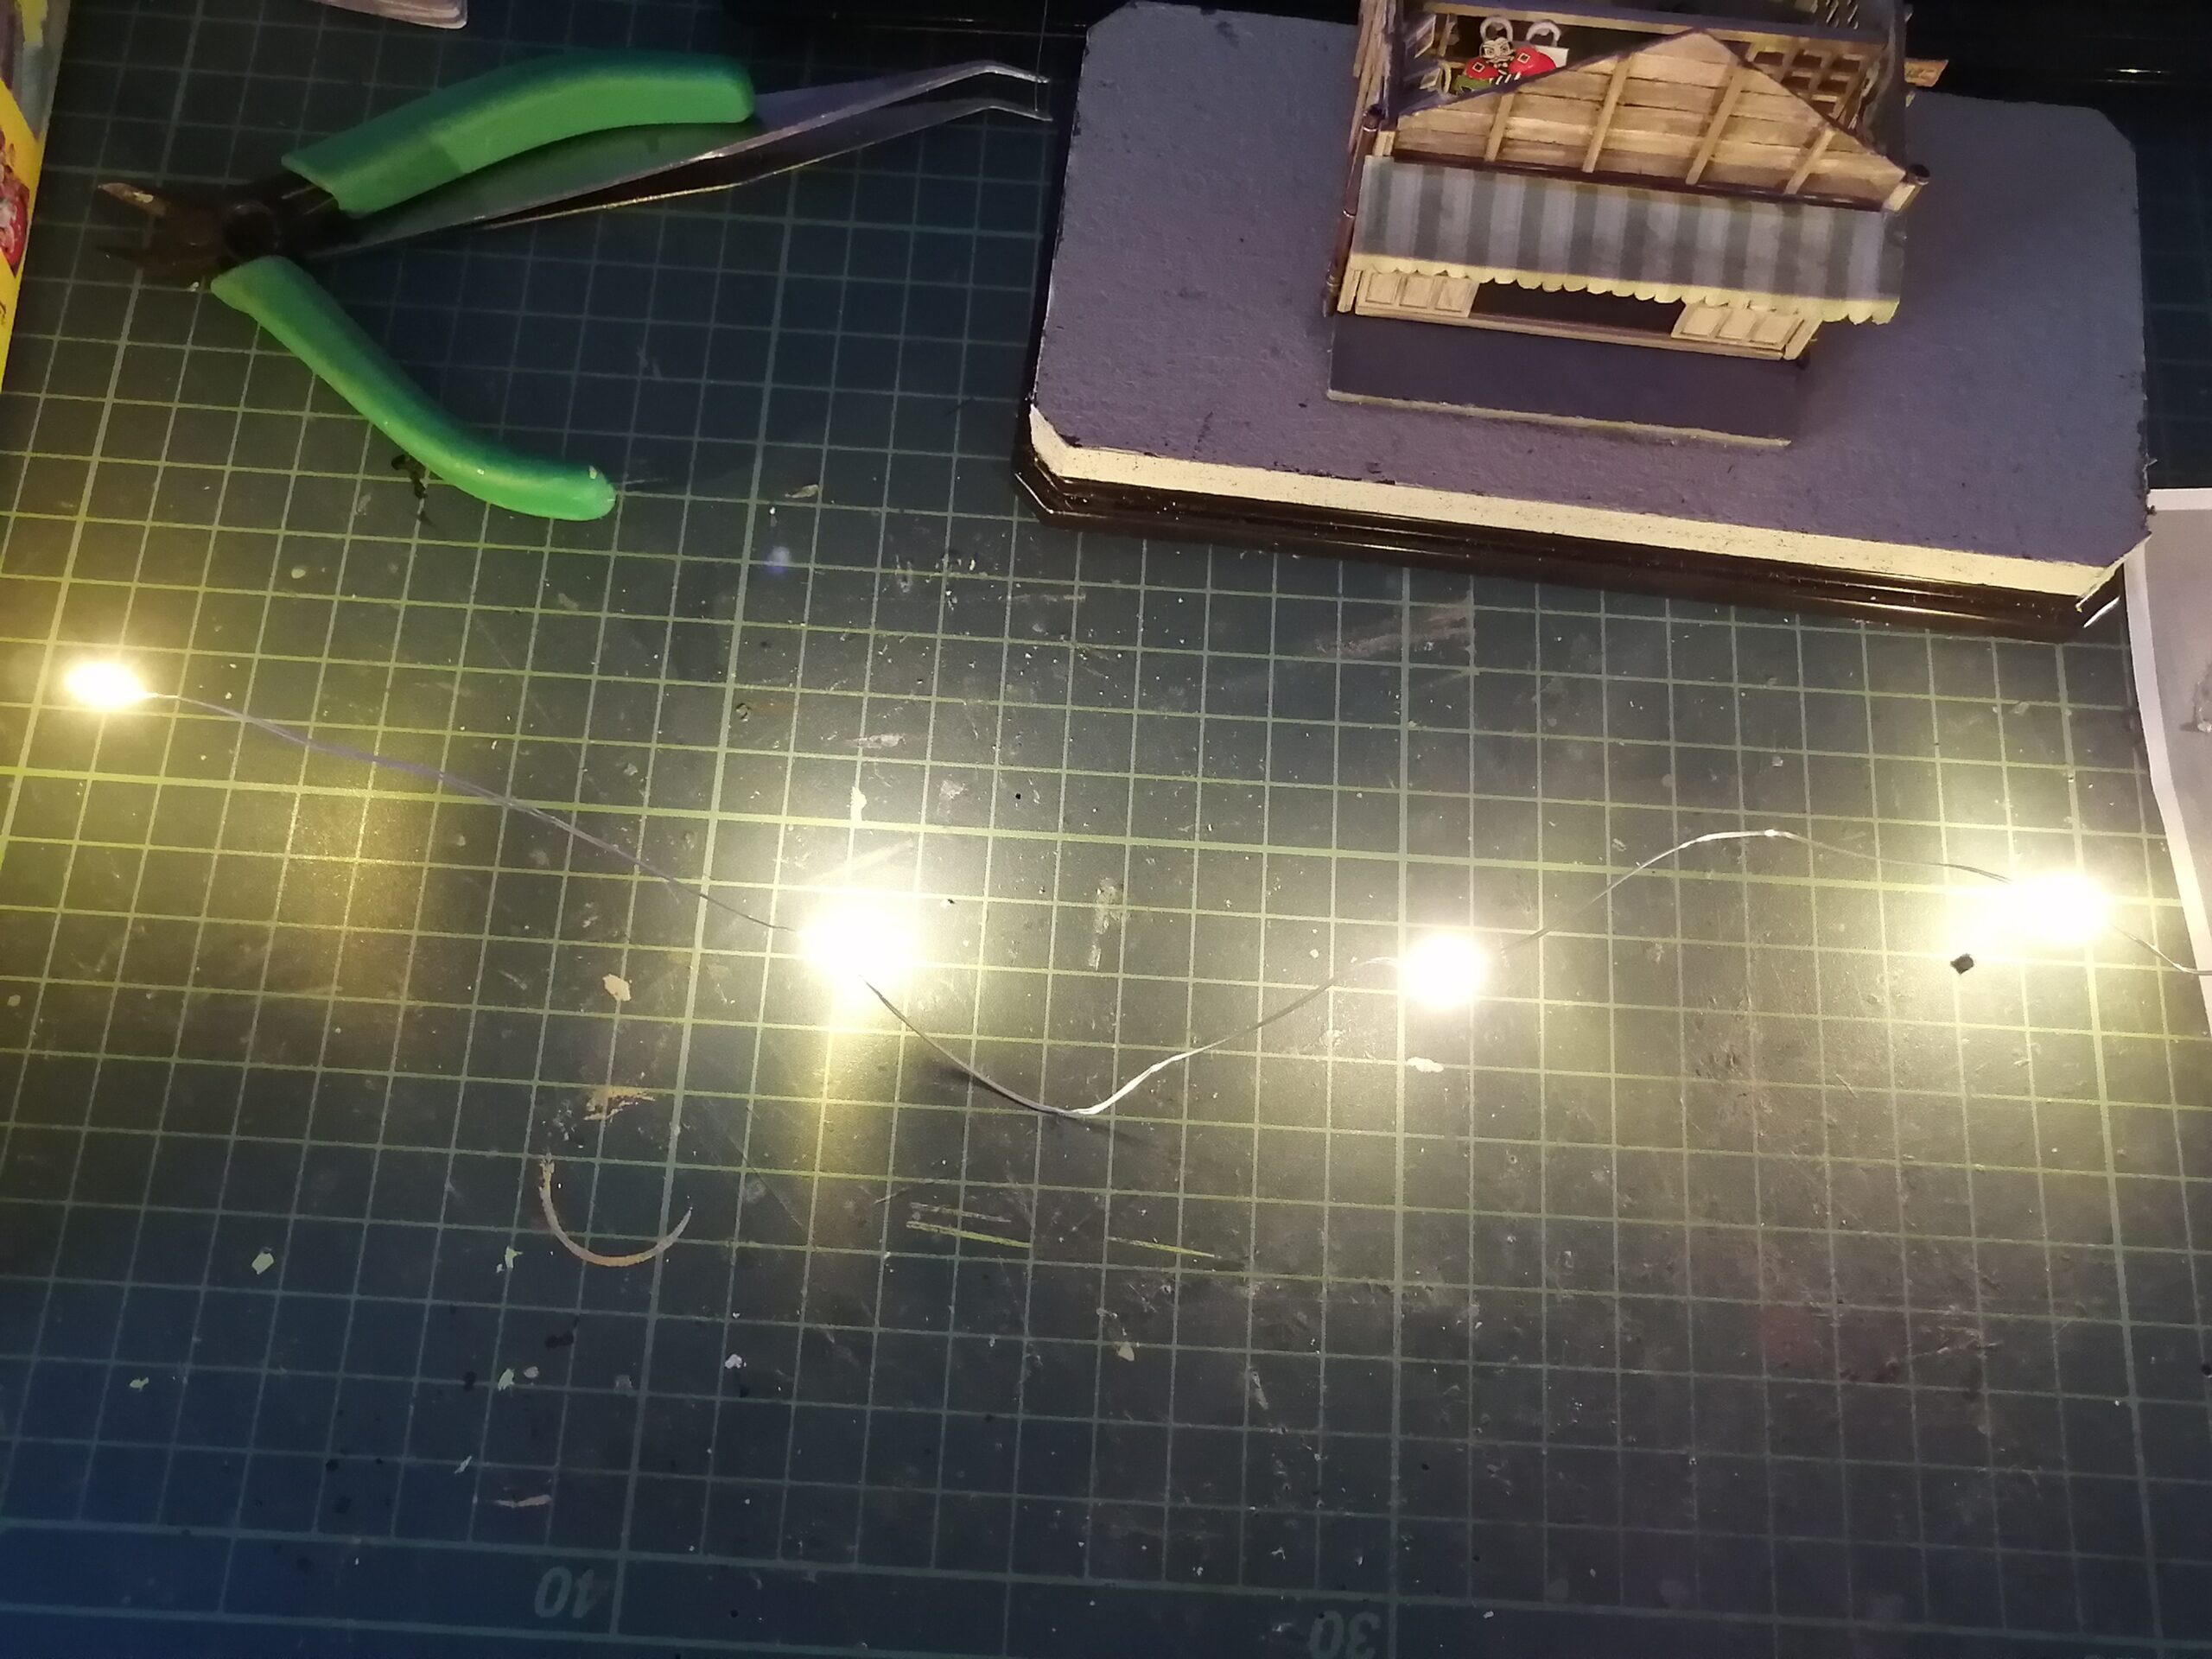
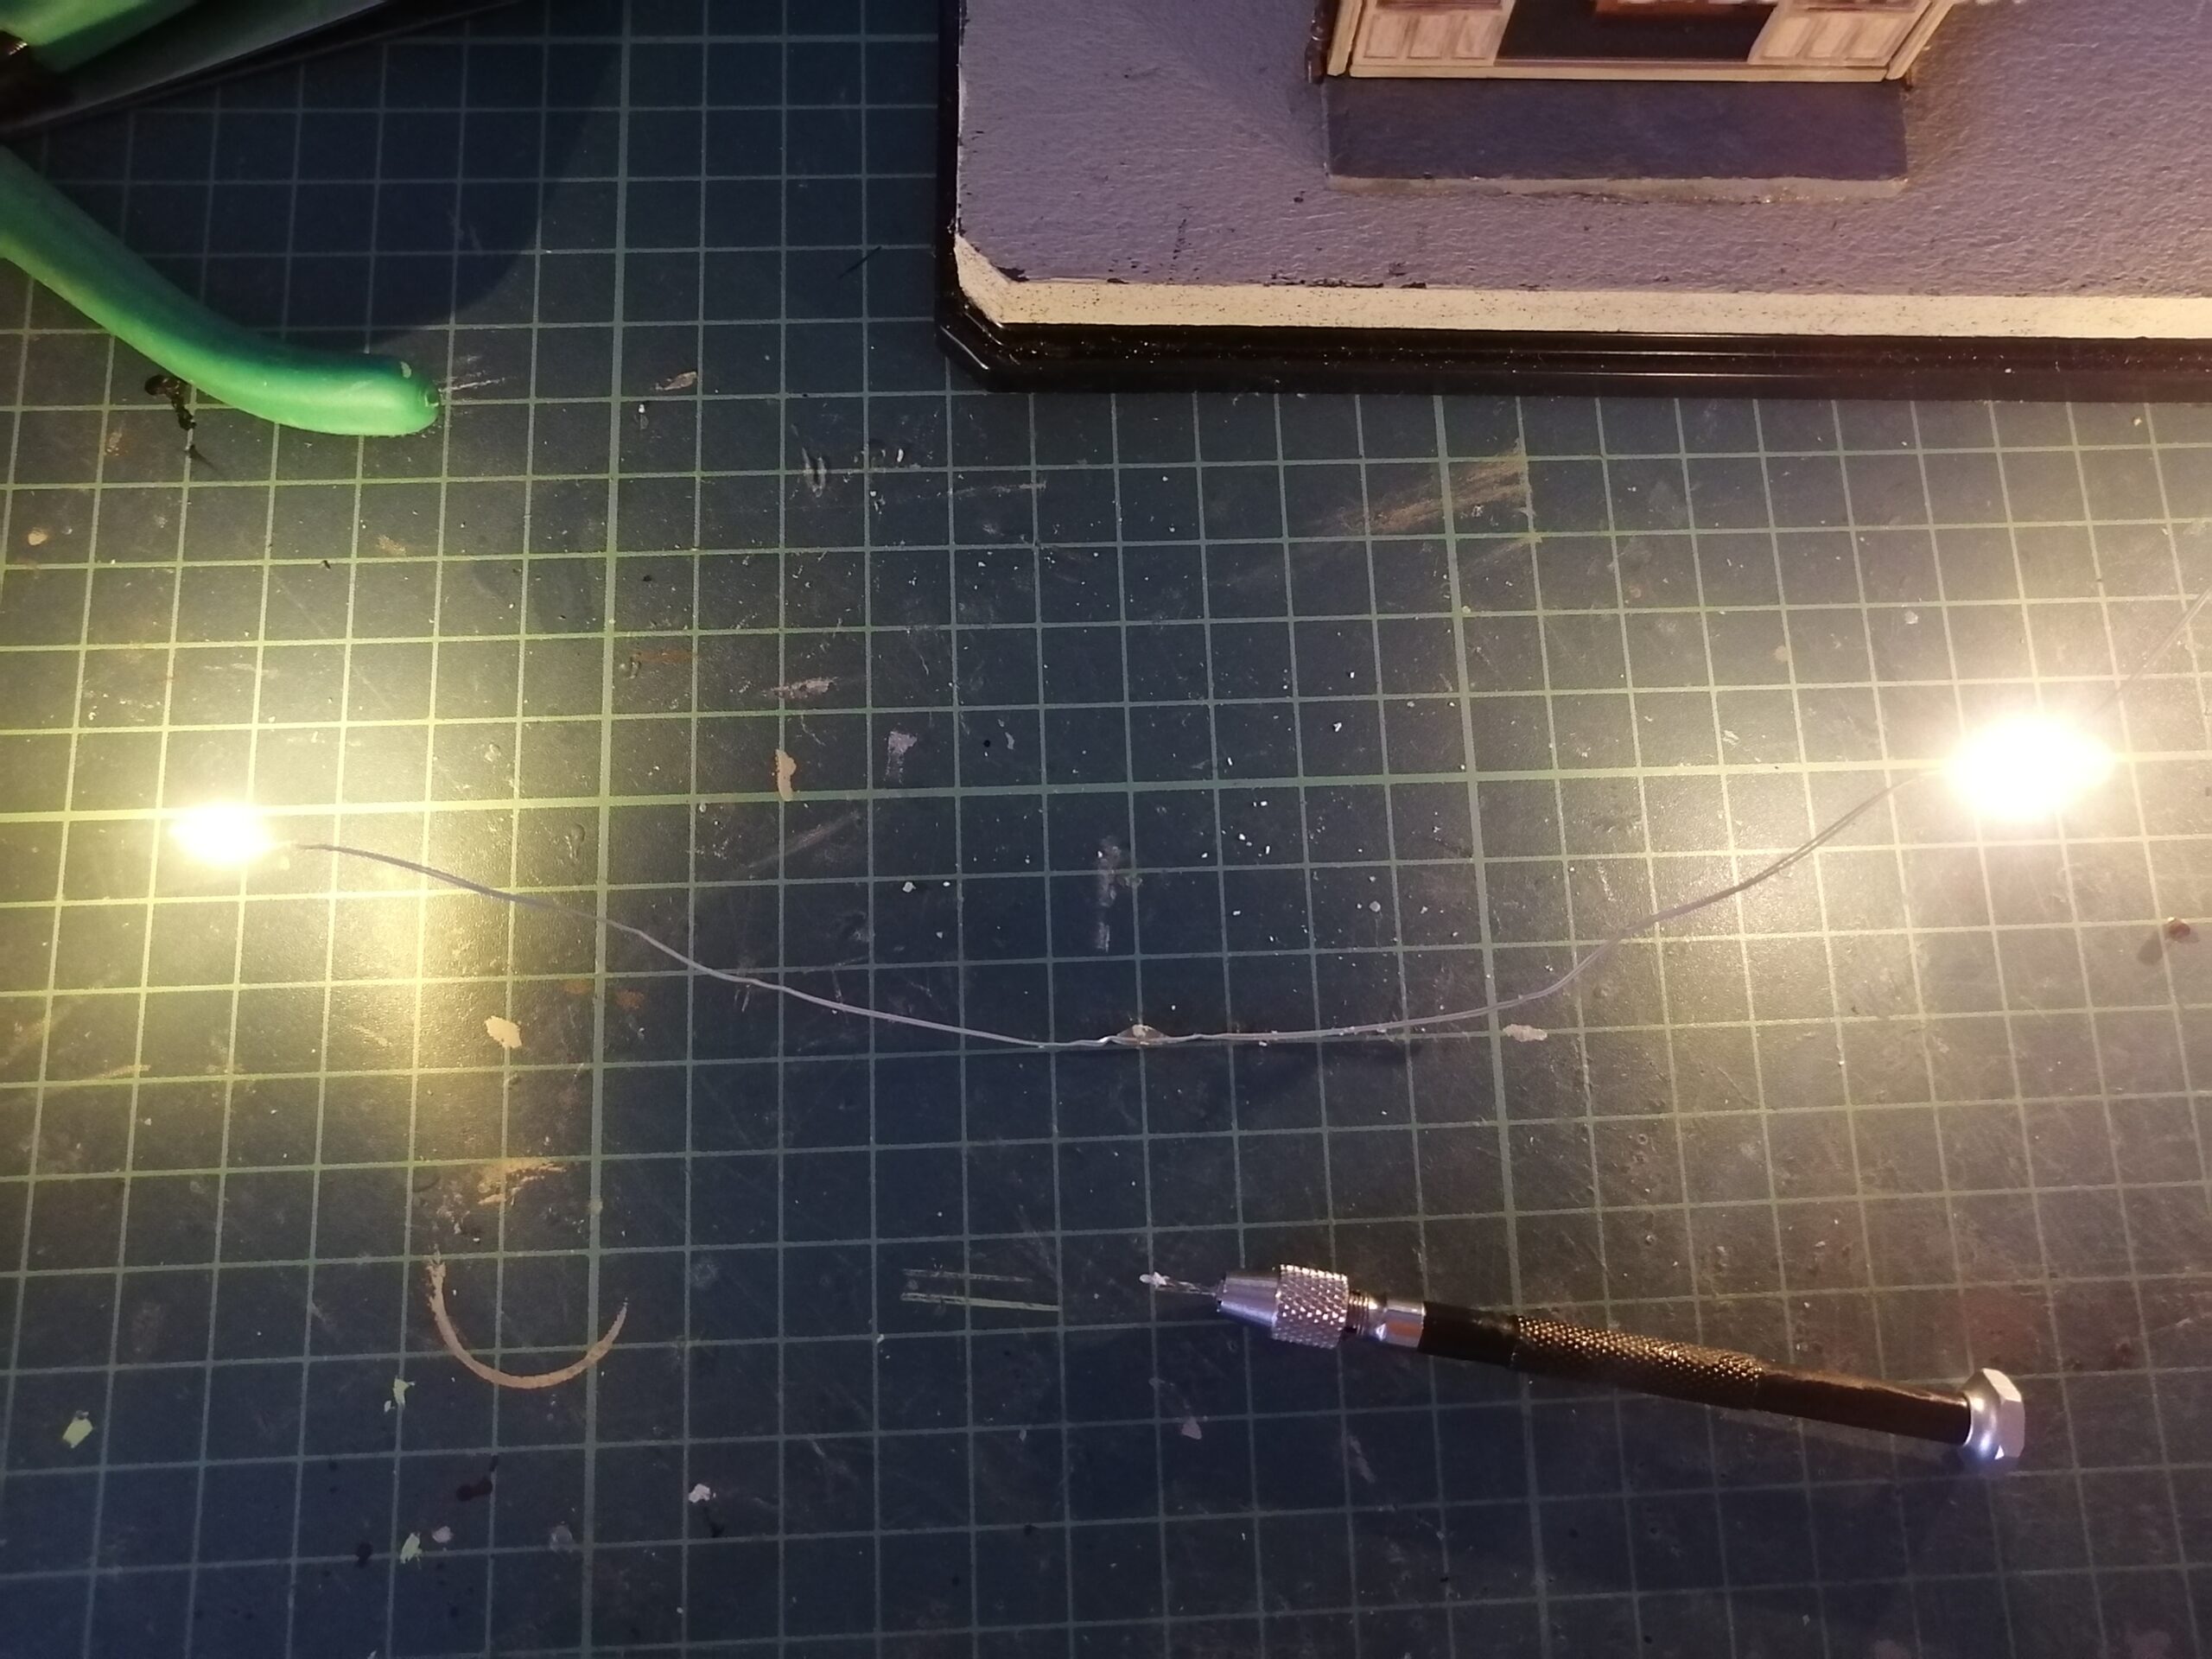
2つの点いているLED電球の間のLED電球が破壊完了したものです。
Working while turning on the light bulb is because it is obvious that “the light bulb goes out = destruction is complete”. The tip of the pin vise slips and escapes, but once it gets caught, the hole can be dug smoothly with a drill. In the meantime, only the flickering … and the LED bulb will go out.
The LED bulb between the two lit LED bulbs has been destroyed.
![[商品価格に関しましては、リンクが作成された時点と現時点で情報が変更されている場合がございます。]](https://hbb.afl.rakuten.co.jp/hgb/200c3196.744c99d0.200c3197.e45e61e9/?me_id=1248280&item_id=10628597&pc=https%3A%2F%2Fthumbnail.image.rakuten.co.jp%2F%400_mall%2Fakibaoo-r%2Fcabinet%2Fgi1167%2F4950344062027.jpg%3F_ex%3D240x240&s=240x240&t=picttext "[商品価格に関しましては、リンクが作成された時点と現時点で情報が変更されている場合がございます。]")

この方法の良いところ
The good thing about this method
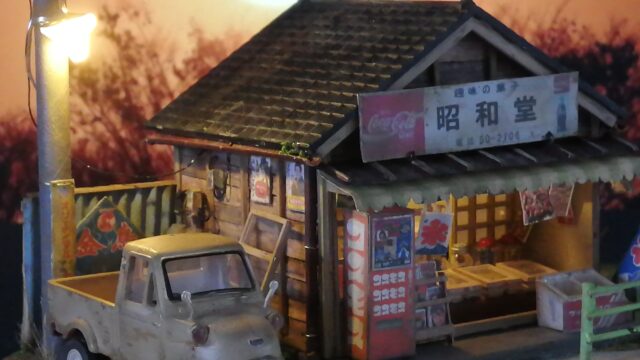
USB接続で点くので、作品のディスプレイが容易です。
電池式となると、もっとどこにでも置けるようにディスプレイ範囲は広くなりますが、電池ボックスのせいで作品がゴツくなり、重くもなります。
スイッチを入れなくてもUSBを挿しさえすれば、点灯する手軽さが良いと思います。
作品に応じて、いらない電球を破壊することで、容易に配線ができます。
配線は、一筆書きを考えるように、最短で電柱と室内を結びつける工夫が必要ですが、回路やはんだづけをするよりも圧倒的に簡単でリーズナブルです。
大きな作品となる場合は、USBハブを配置し、複数の電飾をそこに集約すれば、大量のLED電球の点灯も可能です。
100円均一に行ってこれを見かけたら、私は買いだめをしています。
Since it is turned on by USB connection, it is easy to display the work.
Battery-powered gives you a wider display range so you can put it anywhere, but the battery box makes your work rugged and heavy.
I think it’s easy to turn on the light as long as you plug in the USB without turning on the switch.
Depending on the work, you can easily wire by destroying unnecessary light bulbs. Wiring requires a device that connects the utility pole and the room in the shortest time, as if you were thinking of writing with a single stroke, but it is overwhelmingly easier and more reasonable than wiring or soldering.
For large works, you can place a USB hub and collect multiple lights there to turn on a large number of LED bulbs.
When I go to a 100-yen shop and see this, I stock up.